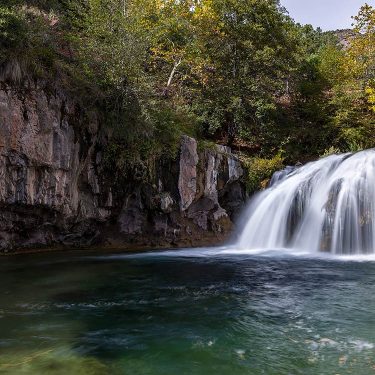
Prepare for Yosemite National Park’s most popular hike with this 8-week training plan.
In 2019, I was lucky enough to score a permit to hike Half Dome in Yosemite National Park. The hike was equal parts stunning and grueling. A lot of things didn’t go to plan during the hike. Some mishaps I could chalk up to bad luck (e.g., my water filter breaking), while others I completely brought on myself, like my decision not to train for the hike. Looking back, I would have saved myself a lot of pain and numerous ice baths to soothe my aching muscles.
When I began prepping for my Pacific Crest Trail thru-hike in 2022, I promised not to make the same mistakes I did on Half Dome. Letting a preventable injury derail my hike simply wasn’t an option, so proper training was a must. So, I linked up with Lee Welton, a personal trainer, PCT thru-hiker, and founder of Trailside Fitness to help get me trail-ready.
Lee worked with me to create a custom 12-week PCT training program to prepare my body for the demands of trail. Fortunately, it ended up paying off because I was able to finish the trail injury-free!
Getting ready for a hike as challenging as Half Dome is equal parts exciting and intimidating. Although training for a long day hike may seem like overkill, it will make a huge difference. The right physical preparation can minimize your chances of injury and help make sure your Half Dome experience is unforgettable — for all the right reasons.
I reached back out to Lee to ask if he’d be interested in whipping up a custom training plan for prospective Half Dome hikers, and he was all in. Make sure you bookmark this eight-week training program for your Half Dome day hike or future backpacking adventures!
When Should You Start Training For Half Dome?
Summiting Half Dome isn’t for the faint of heart — it’s a rugged, demanding trek even the most experienced hikers find challenging. For this reason, you should aim to kickstart your training program at least eight to 12 weeks ahead of your hike. Even if you’re strapped for time, scheduling weekly training hikes or hitting the stair stepper at your gym can increase your chances of success.

How To Train For Half Dome
Can you train for Half Dome by just hiking? Sure, that’s always a strategy. But according to Lee, it’s not enough. “There will be some positive physical adaptations that happen from hiking alone,” says Lee, “But your aim is to minimize how much adaptation needs to occur by quality training beforehand. A better base level of fitness will mean less stress on your body when starting your hike. That means less risk of injury.”
This eight-week fitness roadmap will boost your odds of successfully summiting Half Dome while also limiting your risk of injury on trail. The training program is split into three categories: Strength Training, Hike Conditioning, and Rest Days. We’re going to guide you through these recommended exercises and how to perform them correctly to achieve maximum results.
Training Tips and Instructions

This 8-week training program includes two days of strength training, three days of cardio, and two rest days a week. If you can’t do five workouts a week, take a training hike every other week and skip the loaded pack walk.
Strength workouts should take 30-40 minutes to complete. For each exercise, aim to complete three sets of 12-15 reps and then rest for 30 seconds between each exercise. Feel free to add more weight or throw on a weighted pack for added resistance. You know your body so if something doesn’t feel right or hurts, modify the exercise or skip it, and take extra rest days if needed.
On your rest days, check out these short videos on how to care for sore feet and calves, make hiking uphill easier, and other simple strategies to keep your body in top shape on and off trail.
8-Week Training Plan For Half Dome
Strength Training Exercises:
1. Goblet Squat
Instructions:
- Start by standing with your feet shoulder-width apart, gripping a dumbbell or kettlebell close to your chest with both hands and elbows pointing downward.
- Engage your core and begin to lower your body into a squat, keeping your chest upright, heels flat, and back straight.
- Lower your thighs until they’re parallel to the ground or as low as is comfortable for you.
- Push through your heels to stand back up and return to the starting position.
Watch how to do it here.
2. Dumbbell Row
Instructions:
- Holding a dumbbell in each hand, stand with your feet shoulder-width apart.
- Bend your knees slightly and hinge your hips forward until your back is parallel with the floor.
- Maintaining a straight back and engaged core, pull the dumbbells towards your hips, squeezing your shoulder blades together and ensuring your wrists stay straight.
- Slowly lower the dumbbells back to starting position with your arms fully extended.
Watch how to do it here.
3. Dumbbell Romanian Deadlift
Instructions:
- Feet shoulder-width apart, hold the dumbbells in front of your thighs with your palms facing your body.
- Squeeze your glutes and maintain a straight back as you slowly hinge forward at the hips, lowering the dumbbells along your legs while keeping them close to your body.
- Reverse the movement by pushing your hips forward and return to standing.
Watch how to do it here.
4. 3-Way Step Down

Instructions:
- Stand on a solid step or platform with one foot hovering over the edge.
- Make sure your toes are pointing forward and your weight is centered on your working leg (the one on the step).
A. Forward Step Down
- Push your hips back slightly and bend your knee on your working leg.
- Slowly lower yourself until the heel of your free foot lightly touches the ground.
- Push through the heel of your working leg to raise yourself back up to the starting position.
B. Lateral (Side) Step Down
- Push your hips back slightly and bend your knee on your working leg.
- Slowly lower your free leg towards the ground, slightly hinging at the hips. Lower the foot to the ground, but do not put weight through it.
- Push through the heel of your working leg to raise yourself back up to the starting position.
C. Back Step Down
- Push your hips back slightly and bend your knee on your working leg.
- Slowly lower yourself until the heel of your free foot lightly touches the ground behind you.
- Push through the heel of your working leg to raise yourself back up to the starting position.
Watch how to do it here.
5. Forward Lunge
Instructions:
- Stand with your feet hip-width apart, hands at your sides or holding dumbbells.
- Take a step forward, lowering your hips until both knees are bent at about 90 degrees. Make sure your front knee doesn’t creep past your toes.
- Drive through your front heel to return to the starting position.
Watch how to do it here.
6. Single Calf Raise

Instructions:
- Stand on the edge of a step or raised platform with your heel hanging off the edge.
- Keep your knee straight as you lift your heel as high as possible.
- Slowly lower your heel below the step until you feel a stretch in your calf. Be careful not to lift your toes.
- Switch to the opposite leg and repeat.
Watch how to do it here.
7. Side Plank
Instructions:
- Lie on your side with your legs straight and one foot stacked on top of the other.
- Place your elbow under your shoulder for support.
- Raise your hips a few inches off the ground, forming a straight line from head to feet.
- Maintain this position for 30 seconds on each side, keeping your core engaged.
Watch how to do it here.
8. Max Hold Plank
Instructions:
- Get into a forearm plank position with your elbows directly under your shoulders and body forming a straight line from head to heels.
- Activate your core, glutes, and leg muscles to support your body.
- Hold the plank for as long as possible and try to extend your hold time with each attempt.
Watch how to do it here.
Hike Conditioning Exercises
Hill Repeats
Hill repeats are an effective speed workout to build leg strength and improve your hiking pace. For this workout, you’ll need access to a stairmaster or treadmill set on an incline. If you don’t have access to a gym, you can use the stairs in your apartment building, local sports stadiums, or outdoor amphitheaters.
The goal for this workout is to start with 20 minutes of ascending, then add an extra round each week. For example, if you’re able to complete a stair set in three minutes (not counting the descent), start with seven rounds the first week. Then, crank it up to eight rounds the next week, and keep adding on from there.
Pro tip: Don’t treat this as a race to the top. Take it steady, find your groove, and try to breathe only through your nose as you ascend.

Weighted Pack Walk
Weighted pack walks take the hassle out of finding a local trail or mountain to train on. All you need is a backpack and some bulky items to fill it with. Start by hauling 10 to 15% of your body weight. For instance, if you weigh 150 pounds, aim for a 15-pound pack. Strap on your pack and go for a 45-60 minute walk. Don’t stress about the terrain or your speed — just focus on getting your body used to the extra weight. Each week following, add a couple of pounds. For example, if you started with a 15-pound pack in week one, bump up to 17-pounds in week two, and so on.
Pro tip: Don’t use weights or dumbbells, they’ll just sink to the bottom of your pack and put unnecessary strain on your back. Instead, opt for a mix of books, gear, and blankets to keep your pack weight balanced. Or you can snag a weighted vest that’ll let you adjust your level of resistance.
Training Hike
Just like with the weighted pack drill, you’re going to start with a pack that’s 10-15% of your body weight. Begin at a mileage and elevation profile that feels comfortable to you; 4 miles and 1,000 feet of elevation gain is a great place to start. Then, add two miles each week while also increasing the pack weight very incrementally, a pound or so. By the end of the eight-week program, you’ll be clocking in at 18 miles, equal to the round trip distance of Half Dome.
Pro tip: Unlike weighted pack training, you will use your gear for your training hikes. You won’t be carrying a fully loaded pack for Half Dome, but you will need to lug heavier items like food, water, and emergency gear. All of this adds up and can strain your back if your body is not adjusted.
For more information on hiking training plans, videos, and hiker fitness resources from Lee Welton visit his website at trailsidefitness.com.
Seen in: California, Fitness, Hiking, Yosemite