Tackle the picturesque Half Dome with this burly, full-day hike.
Few places capture the essence of “America’s best idea” like Half Dome, the most famous of Yosemite hikes. Rising over 8,000 feet above sea level, Half Dome is a granite monolith characterized by its rounded crest and distinctively flat face that looks like it was cleaved in half.
Known to the original stewards of Yosemite Valley as Tis-se’-yak or ‘face of a young woman stained with tears,’ the first documented ascent of Half Dome was made by Scottish mountaineer George Anderson in 1875. Years later, Half Dome continues to captivate outdoor enthusiasts and thrill-seekers alike, ranking as one of the most iconic hikes in the country.
The hike up to Half Dome is no picnic and often requires a detailed training plan. Getting to the top is an all-day undertaking that’ll put your strength and stamina to the ultimate test. This guide will walk you through everything you need to know to hike Half Dome in a single day.

Half Dome Fast Facts
- Roundtrip distance: 14 miles via Mist Trail or 16.5 miles via John Muir Trail
- Elevation gain: 4,800 feet
- Duration: 10-14 hours
- Difficulty: Extremely difficult
When to hike: Late June through mid-September, depending on the Sierra snowpack. Summer brings longer days with scorching hot temps in the valley and frequent afternoon thunderstorms. Fall offers less daylight and the chance of early-season snow, but daytime temperatures and trail conditions are usually more pleasant.
Permits: A permit is required to hike Half Dome when the cables are up. If you don’t have a permit, you might also need a reservation to drive into Yosemite after 5 am and before 4 pm during peak season.
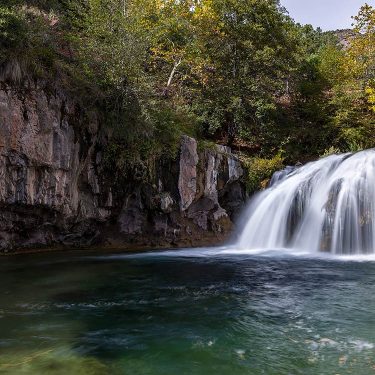
On-trail amenities: Flush toilets are located near Vernal Falls Footbridge (below Vernal Falls) along with composting toilets above Vernal Falls, the top of Nevada Falls, and in Little Yosemite Valley.
Water availability: Natural water sources are available along the trail. Don’t forget to bring a filter! The last reliable water source is at Little Spring, around .75 miles before the subdome. Potable water is also available at the Vernal Falls Footbridge.
How to Get a Half Dome Permit
If you plan to climb Half Dome in a single day, you need a permit — and the competition is fierce. Only 225 day hikers are allowed to ascend Half Dome when the cables are up between Memorial Day and mid-October. If you already have a permit, congratulations! Go ahead and skip this section. But if you’re still looking for a permit, here are a few ways to get one.
Preseason lottery: As mentioned, 225 permits are available each day during the hiking season for day hikers to summit Half Dome. These permits are distributed through a lottery system. The application period for this lottery opens March 1st-March 31st and can be obtained through Recreation.gov, with results announced in mid-April.
Daily lottery: Additional permits are also set aside through a daily lottery. Daily lottery applications are due two days before your desired hiking date, with results announced later the same day. So, if you want to hike on a Saturday, you would apply for a permit on Thursday and get your results by Thursday evening.
Wait at the subdome: You don’t need a permit to hike the Half Dome trail until you reach the subdome. If you’re feeling lucky, you can wait at the base of the subdome and hop on another hiking group’s permit. Larger groups may have one or two extra spots available on their permit. The ranger checking permits will verify this information and give you the green light to continue your hike.
Track cancelled permits: There is a permit tracker app from Outdoor Status where you can sign up to receive notifications of when popular permits are cancelled by other parties. You can set up either an unlimited tracker or a one-off to keep an eye out for Half Dome hiking permits on the date of your choice.
How To Get to the Half Dome Traihead
Most hikers start their Half Dome journey from the Happy Isles Trailhead (Mist and John Muir Trails). You can leave your car in the Valley Trailhead parking lot, which is decently sized but fills up fast during the summer. If you arrive before the first shuttle at 7 am, you can just hoof it to the trailhead from the parking lot.
Yosemite is also home to opportunistic black bears that won’t hesitate to break into your car if they smell anything that piques their interest. Before you hit the trail, remove any smelly stuff from your car–food, garbage, air fresheners, beverages besides water–and store them in a bear box. Trust me, you don’t want to complete one of the toughest hikes in America only to return to a trashed car and an angry park ranger ready to dress you down.

Half Dome Trail Map
Half Dome is a well-marked and easy-to-follow trail. It’s hard to get lost, but it’s always smart to pack a backup form of navigation. This could be a paper map or smartphone app like onX or Gaia that can pinpoint your location even when you’re out of cell service.
The hike to Half Dome combines the Mist Trail and the John Muir Trail. The overall distance and duration of the hike will depend on the trail you take. The John Muir Trail will add some extra distance but its gentler grade is easier on the knees, a blessing after descending over 4,000 feet in eight miles. Typically, hikers opt to take the Mist Trail up and the John Muir Trail down.

Climbing the Half Dome Cables
When you reach the cables, take a few deep breaths, soak in the view, and congratulate yourself for getting this far! Half of the reason people hike Half Dome is to scale its infamous cables. After all, it’s not every day you get to climb up a 45-degree granite slope and live to tell the tale. Of course, I can’t tell you not to be nervous, but I can give you some pointers to crush the home stretch.
Tip #1: Wear the right footwear
Your ratty trainers won’t cut it. Years of foot traffic have worn down the strip of granite that runs between the cables, making it very difficult for regular old shoes to grip. If you haven’t already, invest in a sturdy pair of hiking boots or grippy trail runners and break them in before your hike.
Tip #2: Don’t go empty-handed
White-knuckling the cables will cause you a world of hurt so just don’t do it. Wear gloves with a snug fit and grippy palms, like work or gardening gloves, and don’t leave them at the bottom of the cables when you’re done using them. While you may think you’re being nice by leaving gloves for another hiker, the Park Service is fed up with carting away garbage bags full of abandoned gloves at the end of the season. Do them a solid and pack out your gloves.

Tip #3: Prepare for sore arms
Hauling yourself plus a fully loaded daypack up a nearly vertical climb of over 400 feet is seriously draining. You’ll feel the burn especially in your arms — all the more reason to train up! Give yourself time to catch your breath and replenish your energy. Remember, there’s no rush; it’s better (and safer) to keep a steady pace than blasting up the cables in one go.
Tip #4: Common sense is better than a harness
Unpopular opinion: Wearing a harness on Half Dome is not only ineffective, but it could also put you in serious danger. The repetitive action of clipping and unclipping your carabiner between poles quickly saps your energy and stifles your pace. Plus, most hikers who use a harness aren’t wearing the right gear that could save them in the event of a fall. This is especially problematic because it can give people a false sense of confidence and encourage them to push past their limits with the assumption that if they fall, their DIY system will catch them.
Tip #5: Talk to other hikers
By mid-morning, the cables turn into a hiker highway. Get comfortable communicating your needs to hikers both above and below you. For example, if you need to stop and retie your shoelaces, notify the hikers behind you. If you notice something sticking out of the person’s pack ahead of you, tell them. If you need a break, give the people behind you a heads up so they can either wait or go around you. And don’t forget to smile at the people you pass on your way up and down the cables. A bit of encouragement to fellow hikers is never a bad idea!
Tip #6: When to avoid the cables
Never, under any circumstances, attempt to climb the cables if it’s raining or you hear thunder. The cables become extremely slippery and fatally dangerous when wet. Even if it’s not raining, stay off the cables until the granite is completely dry. Afternoon thunderstorms are common in Yosemite, so it’s best to start early and be on your way back down the cables by 1 pm latest.

Where To Stay Before and After Your Hike Dome Hike
If you want to stay in the area before or after your hike (a wise choice), you can make a reservation at one of the many campgrounds or AirBnBs in and around Yosemite. If you’re looking to indulge a bit, you can also treat yourself to a hotel and enjoy a comfy bed and hot shower. We’ve curated a selection of hotel and campground options below.
Hotels
Budget: Best Western Plus Yosemite Gateway Inn
- Location: 1.5 hours south of Yosemite Valley Trailhead parking
- Rates: $150 – $250/night
Mid-range: Rush Creek Lodge and Spa
- Location: 50 minutes west of Yosemite Valley Trailhead parking
- Rates: $300 – $600/night
Splurge: Ahwahnee Hotel
- Location: 5 minutes from Yosemite Valley Trailhead parking
- Rates: $500 – $700/night
Campgrounds
In-Town: Hipcamp’s Diamond Gulch
- Location: 1.5 hours west of Yosemite Valley Trailhead parking
- Rates: $30 – $100/night
Outside Yosemite: Summerdale Campground
- Location: 1.25 hours south of Yosemite Valley Trailhead parking
- Rates: $50/night
In The Park: North Pines
- Location: Across the road from Yosemite Valley Trailhead parking
- Rates: $30 – $50/night
Seen in: California, Hikes, Hiking, Hiking in California, Yosemite