Learn from my mistakes for a successful and enjoyable Grand Canyon backpacking trip.
I should’ve known my jaunt into the Grand Canyon via the Escalante Route was doomed when I took my first step with a bandaged hand.
Perhaps I should’ve called it quits and headed back up the Tanner Trail when I slipped and ended up with several cactus filaments in my butt, or when my hiking partner and I noticed that it took us an entire hour to go little more than one mile (the first mile).
We had used AllTrails to find our shoreline camp but instead found ourselves on a cliff, overlooking the Colorado River. Maybe this was the moment I should’ve dug the paper map out of my backpack—maybe.
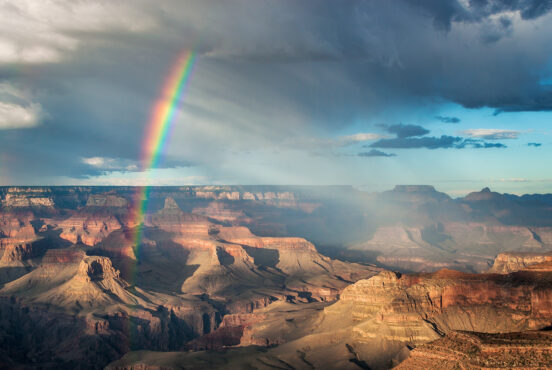
I can pinpoint dozens of things that went wrong on this adventure, including a near-SOS situation. But, I made it out of the canyon that so famously surprises even the hardiest of hikers. Since I survived to tell the tale, I can help your Escalante Route adventure go significantly better than mine.

Planning for the Escalante Route
When my friend and I waltzed into the Grand Canyon’s Backcountry Information Office, we were hoping to score walk-up permits to hike the Rim-to-Rim-to-Rim over the weekend. The ranger at the office informed us that no permits were available, but suggested the less-popular Escalante Route.
Knowing the Escalante Route was a viable backup, I had already researched this trail. I felt confident to tackle it, especially when the ranger confirmed that the AllTrails map was accurate.
Still, I packed and took photos of a paper map and detailed trail descriptions — neither of which got used until after we got into trouble.
Day 1: Tanner Trail (Lipan Point) to Cardenas Creek

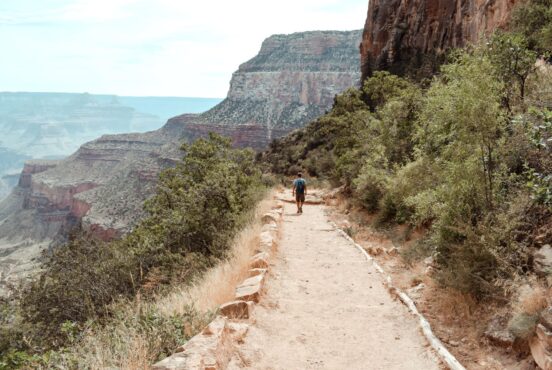
Tanner Trail is straightforward and easy to follow. It’s very steep in places and sports patches of snow in the first mile in early spring. Because of the on-and-off snow (and on-and-off microspiking), our too-heavy packs, and a sudden but severe bout of allergies on my part, it took us an hour to go just a hair over one mile.
Most Escalante Route hikers make Tanner Beach their first camp. There’s ample soft sand to sleep on, water available for filtering, and even a composting toilet. Since we were doing the entire route in just two days, we opted to camp at Cardenas Creek, another 3 miles (of soft, loose sand) downcanyon.
As we approached our planned camp, we realized it was taken by a large group of rafters. Not wanting to disrupt their group, we searched AllTrails for another camp along the river. Unfortunately, we failed to note the topography and found ourselves a hundred feet above the river with too little daylight to make it down.
We returned to Cardenas with deflated spirits. Fortunately, the rafters back at camp didn’t mind sharing the site with us. They even fed us steak kebabs, rice, vegetables, and cookies. It was a much needed win and much more satisfying than the freeze dried meals we planned to eat.
Downside: Our packs didn’t get any lighter that night.

Day 2: Cardenas Creek to South Rim (Moran Point) via New Hance Trail
We started day 2 strong with a relatively docile segment, presenting only minor navigational challenges and some exposed hiking. We almost missed a designated U-turn, but caught our mistake quickly and were able to butt-slide our way back onto the correct route.

But then we hit the The Papago Wall.
This segment is notoriously challenging and, for lack of a better term, where shit hit the fan for us.
We ascended the infamous wall without issue, despite sucking wind while climbing the near-vertical wall in our packs. As the official trail description reads, “The climbing is easy, but no mistakes are allowed.” Copy that!

After topping the ledge, the trail traverses less than 100 yards downcanyon before coming to a talus slope. The correct route is unassuming: Hikers must descend the slope via a steep chute that leads to the canyon floor. Miss the turn, and you’ll find yourself on a precarious face of scree and talus.
I’ll give you one guess as to what happened to us.
After ascending the Papago Wall, the route wasn’t clear. A combination of high winds knocking down many cairns and AllTrails leading us in the wrong direction, led to our ultimate mishap: getting completely lost.
Looking back, it’s obvious that we put too much faith in the AllTrails app. The detailed trail description from the NPS explicitly explains the chute situation and one we should’ve referenced earlier on.

Tip: Always Use Multiple Trail Descriptions
But we didn’t — and we crawled 50 yards across the scree slope, our footing becoming more precarious with every step. After the executive decision was made to turn back, I decided to let go of my pack. It was causing too much imbalance and I knew I wouldn’t make it off the slope if I kept it on.
So, mentally accepting the fact that I’d be without food and water for the rest of the hike, I released the straps and watched the backpack violently tumble several hundred feet down the slope. I swear I set it down as gently as possible, yet it took off at a Mach-5 speed down the hillside.
Meanwhile, my friend had her finger on the SOS button of her Garmin InReach satellite messenger, ready to call in a heli-rescue. “Just a few more minutes,” I told her. “I really think we can find the trail.”
Slowly, my hiking partner and I crawled back toward the ledge above the Papago Wall, desperate to reach flat ground. Before we made it, I spotted a cairn some 150 feet below. “There!” I shouted to my friend, much of my volume swept away by the strong wind. “We need to descend.”
Down we went — part crawling, part sliding — down the slope. To my relief, my pack sat square in the middle of the trail, comfortably perched after its speedy descent to the correct route. My water bladder was torn and one buckle was destroyed, but I had food — and my headlamp, as luck turned out.

Turning Around is Always a Good Option
It was past 6 p.m. when we reached Hance Rapids, the starting point of our long, laborious ascent out of the canyon and a mile from the Papago drop-in. Two kind campers suggested we stay the night due to dwindling daylight and an approaching storm. However, my friend had a flight to catch the next day, so on we journeyed.
No longer trusting AllTrails, we finally referenced the park system’s official trail description as we trudged through the Supai wash. Throughout this braided trail network— there are several ways to work your way up the wash —we lost a lot of time by stopping and orienting ourselves, afraid to lose the trail again.
The climb out of the canyon on New Hance is grueling. There is no other word for it, especially when you’re in the end stages of an adrenaline rush and are fighting to beat darkness and an impending thunder-snow.
We did manage to beat the winter storm, but not nightfall. We finally exited the canyon around 9pm, three hours after our planned arrival. I was able to keep my fiancé updated through my satellite messenger during the ascent, but he was still sick with worry.

What I’d Do Differently
If you read through this trip report as an experienced backpacker, maybe you cringed at a few parts of the story. Maybe you thought, “That was a dumb mistake.”
I’m with you. Each time I reflect on this trip, I find myself brimming with “what ifs” and “should haves.” What if we’d allowed ourselves more time to complete the route? We should have never relied on a GPS app in a canyon. What if it hadn’t been windy and the cairns weren’t knocked over? We should have used a topo map.
The spiral is endless. To be honest, I’m just thankful we made it off of that slope without tumbling down. Knowing what I know now, I’d do this route again — with these key takeaways.
- Don’t underestimate the Grand Canyon.
- Never rely entirely on GPS systems, especially in places where GPS signals can be impeded (like inside canyons).
- Even if a park ranger tells you the AllTrails (or other GPS map) is accurate, bring backup navigation items—and know how to use them.
- Don’t rely entirely on trail markers. Cairns can be knocked or blown over, ribbon blazes can deteriorate or become grown over, and paint blazes can fade.
- Be willing to work hard to get yourself out of precarious situations. Don’t prematurely send out an SOS.
- Carry a satellite messenger so you can keep people informed and avoid unnecessary rescue situations, or call for help if you need it.
Are AllTrails Maps Accurate?
Whether or not AllTrails maps are accurate depends a lot on where you’re going. Frontcountry, well-developed trails tend to be okay. Many experienced hikers and backpackers favor other apps for backcountry navigation, such as Gaia GPS, Earth Mate, OnX Backcountry, CalTopo, and FATMAP. These are often considered to be more sophisticated mapping apps with better backcountry applications. And, many wonder about the future of any of these hiking maps with Apple’s recent announcement about their upcoming iOS update.
The Short Answer is…it Depends
A hashtag (#AllFails) showcases discrepancies between trail info in the app and the actual trail stats. Hikers often portray these discrepancies in a humorous way, but things can quickly turn dangerous for hikers relying on AllTrails without strong navigational skills.
Matt Johnson, a wilderness guide in Alaska, has his own thoughts on relying on AllTrails: “Hiking a well-defined and marked trail? Sure. Anything else will be inaccurate at best and downright dangerous on some trails.”
“[AllTrails] told me they’d take it off, but never did,” he said. “I don’t think precision or safety are of their utmost concern.” – Nicholas LeMon
Nicholas LeMon, a hiker and member of the Facebook group Basecamp: Outdoor Jobs & More, said he’s been trying to get AllTrails to remove an unofficial and dangerous trail in Washington from the app to no avail. “I was in contact with them about removing it because there is no trailhead (it starts a quarter-mile into the woods). There is no trail over the river to said spot, so one must route-find; and it doesn’t note the particularly perilous situations you’ll come across on this trail,” he said.

Efforts to Change AllTrails Data
I reached out to AllTrails about my Escalante Route experience because I was curious about how this route was created. I couldn’t get a straight answer—just boilerplate language. Their response being, “Our trail pages and maps are maintained by a dedicated, in-house team of data integrity experts.”
It’s unclear if anyone on the AllTrails team actually hikes the routes within the app and verifies them, or if they’re entirely user-generated or pulled from open-source map data with no verification process. The AllTrails rep said, “We’re confident that the [Escalante] route and trail information is accurate,” but didn’t provide any information about how or why they can determine that.
I sent AllTrails my activity data for the route and pointed out the area where we had trouble. “Our data integrity team reviewed your trail activity,” the rep told me. “They saw where you ended up off trail and confirmed that your phone’s GPS was likely impaired in the canyon.”
That’s certainly possible, though I’m not fully convinced. The app never gave me a low signal strength warning, which it should do as a premium app user, and the rest of the route on AllTrails was more-or-less accurate. We were led astray in just that one spot, which AllTrails told me they’ve since adjusted. “Based on your experience and feedback, our data integrity team made an adjustment to the trail map to help future hikers navigate this technical scramble and terrain,” the rep said.
To be clear, I like AllTrails and have used it extensively without issue. I continue to use it to find new trails, read about current trail conditions, and track my activities. But, I won’t rely on it again for backcountry navigation.
How Does AllTrails Work?
The Nitty Gritty
AllTrails is a GPS app that uses GIS data to make mapping intuitive to even the newest hikers. Joe Bassett, backcountry guide and survival instructor at Valiant Outfitters, explained that GIS, or geographic information systems, collect and store geographic information, such as landmarks, buildings, vegetation, and waterways.
“This information is then displayed and provides information about a specific location on analog or digital maps,” he said. “For outdoor and wilderness recreation this is most commonly in the form of topographic maps.”
GPS, or global positioning systems, receives information from satellite networks to determine a specific global location, Bassett explained. “At a rudimentary level, this information is displayed as latitude/longitude, military grid reference system, or national grid system coordinates.”
The power of GIS and GPS becomes evident when they work together in an app to display GIS topographic, trail, or waterway information for specific GPS coordinates. Apps and devices such as AllTrails use GIS information to display maps to make navigation more intuitive, Bassett said.
In Other (Simpler) Words
In the simplest terms, “It helps to think of GIS as a map and GPS as where you are on the map in relation to surrounding mountains, streams, lakes, trails, and other landmarks,” Bassett said.
This technology has made backcountry navigation easier in some regards. Such systems, though, are not without limitations, dead batteries and low signal strength being the two main limiters.
“Low signal strength shortens battery life because the device must work harder to geolocate itself,” Bassett explained. “Many backcountry adventurers, myself included, carry a power bank to recharge phones and GPS devices.”
Additionally, “Obstructions such as dense leaf canopies and canyon and valley walls are the most common causes of weak signals,” he said, adding that carrying devices in pockets or inside backpacks inhibits signal strength.
Where map data comes from and/or how it’s created depends on the GPS system you use. Wildlife ecologist and GIS professional Jaden Skelly pointed out that AllTrails map data mainly comes from a platform called OpenStreetMap, “pointing at a larger, messy issue,” referring to the fact that OpenStreetMap data is user-generated by volunteers.
As of July 2024, it seems that AllTrails is phasing out its OpenStreetMap layer, along with the USGS Topo layer. It’s working toward exclusively using the custom AllTrails map layer.

How to Navigate Backcountry Trails When GPS Fails
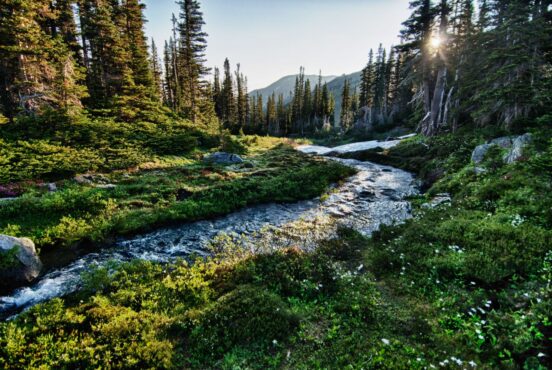
The best way to ensure safety when systems fail in the backcountry is to plan ahead, said Mount Rainier National Park ranger Tim Mastic. “Study your hike beforehand to understand the route, terrain, and conditions to expect. Check in with park rangers for the most up-to-date trail conditions and for any known hazards along your route.”
“Understanding how to read a topographical map and how to properly use a compass is key,” Mastic continued. “Additionally, it’s important to be able to identify landmarks like mountains, rivers, and campsites to assist in finding your location on a paper map, then route-find to plan your next steps.”
If using an app or device in place of a paper map, knowing how they work and their limitations is key to safe adventuring, said Bassett. According to Bassett, the following skills are key for safe backcountry adventuring:
- Interpreting contour lines
- Estimating distances
- Triangulating locations on the map
- Knowing how to establish a perimeter utilizing geologic features such as backstops and guardrails.
- Knowing how to relate your normal stride length to distances on a map.
- Identifying the cardinal directions with a compass
- Identifying the cardinal directions with primitive methods, like using a stick shadow on the ground
- Setting and maintaining a bearing with a compass
- Telling time without a watch
Finally, “make sure someone outside your party knows your plans. Check in with them as soon as you’re back in cell phone coverage. If the check-in is missed, they can contact the appropriate personnel to report an overdue hiker,” Mastic said. And “always carry the ten essentials, even on ‘easy’ day hikes, as you can never be too careful in the backcountry.”
Seen in: Backpacking, Grand Canyon, Hiking, National Parks